1.把yaf-2.3.3.tgz下载到/root
#tar zxvf yaf-2.3.3.tgz
#cd yaf-2.3.3
2.找到phpize到目录
#whereis phpize
phpize: /usr/bin/phpize
3.执行phpize
#/usr/bin/phpize
Configuring for:
PHP Api Version: 20100412
Zend Module Api No: 20100525
Zend Extension Api No: 220100525
4.再执行一下命令
# ./configure – -with-php-config=/usr/local/php/bin/php-config
# make && make install
## 其实这样上面可以合起来写 /usr/bin/phpize && ./configure – -with-php-config=/usr/local/php/bin/php-config && make && make install
执行完返回:
Build complete.
Don’t forget to run ‘make test’.
Installing shared extensions: /usr/local/php/lib/php/extensions/no-debug-non-zts-20100525/
那么我们可以看看这个目录下到底有些什么
#ll /usr/local/php/lib/php/extensions/no-debug-non-zts-20100525/
可以看到 yaf.so php扩展也已经帮我们编译好了,所以接下来我们就开始要回到php去找php.ini的配置文件了.
#vi /usr/local/php/etc/php.ini
然后在php.ini中载入yaf.so
#extension=yaf.so
//在php.ini文件末尾放置【此步可省略,可以用默认配置】
[yaf]
yaf.environ = product
yaf.library = NULL
yaf.cache_config = 0
yaf.name_suffix = 1
yaf.name_separator = “”
yaf.forward_limit = 5
yaf.use_namespace = 0
yaf.use_spl_autoload = 0
重启PHP.
/etc/init.d/php-fpm restart
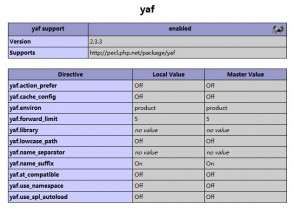
打开phpinfo看效果
